|
| Design by Katie Pollitt |
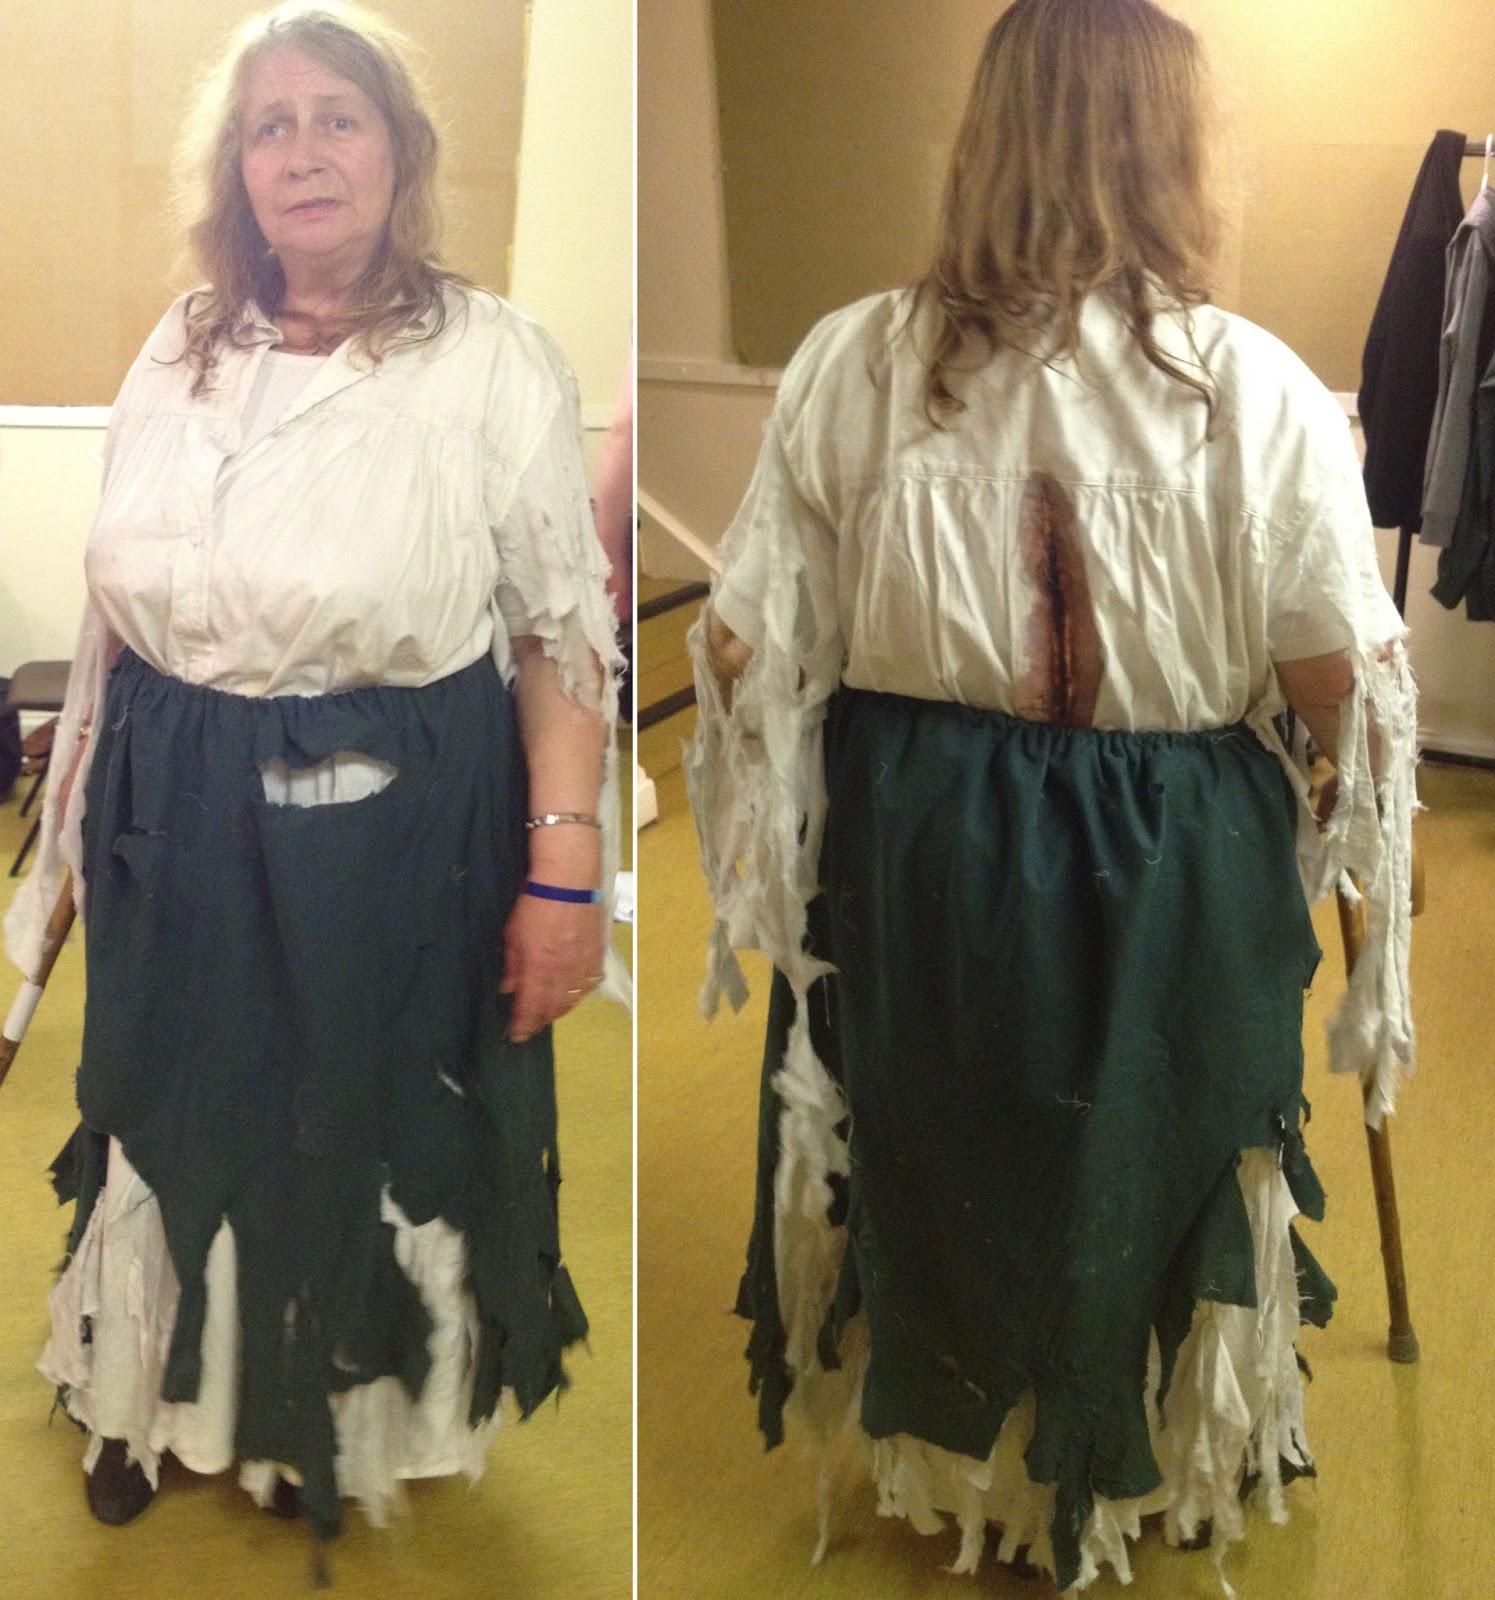
The director wanted the hag to be overly ragged, so I went
a bit mad with the ragging of the skirt, but to keep the actress' modesty she
wore a long night shirt underneath. However because the group only had two of
these, they didn't particularly want it all shredded up, unable to use again
without rags. So
I unpicked the sleeves from the shirt, and used them as a
template to cut two new sleeves, which I then sewed into the sleeve hole and
shredded to pieces.

In order to make the ragging of the night shirt simple to
do, I pegged it to the washing line...with perhaps more pegs than needed... and
so not dragging the Stanley knife through anything else beneath it.
By the way guys, great way to relieve stress/anger...as long
as you're careful...I mean look at the wound I made when making this
costume....

Obviously only joking, above is a photo of the stab
wound I painted onto a scrap piece of fabric, to later attach to the back of
the Hag's ragged and dirtied costume.
Again because I couldn't rag the actual night shirt, for the
used bottom section you would see underneath the green skirt I used scraps of
white fabric, ragged them and then hand sewed these into place.
To emphasise the rags on the night shirt and the skirt I
went over the edges with a graphite stick and then charcoal, as the graphite
didn't seem to do quite a good a job as I was hoping. The purpose of this was
to make the rags look dirty but when I first did it, up close it looked more
like she'd been in a fire...but after rubbing the excess off from a distance it
just dulls the white a bit which is good.

The Wound:
The Hag played the part of the ghost of the woman who was
stabbed in the back...which therefore meant she needed a stab wound on her back.
Again because the night shirt was to be able to be worn again,
I had to come up with a way that wouldn't damage the original garment, so I
decided to make it separately and then stick it to the night shirt once done.
 To do this I got two
layers of white cotton fabric to match the night shirt, and ripped one layer
with the edge of scissors, marking where the top and bottom of the rip would be
onto the other layer of fabric, showing me where the wound should be.
To do this I got two
layers of white cotton fabric to match the night shirt, and ripped one layer
with the edge of scissors, marking where the top and bottom of the rip would be
onto the other layer of fabric, showing me where the wound should be.
I then used matt Impasto
Gel to get the raised look of the skin peeling back from the wound (impasto
gel is something you can mix into acrylic paint to thicken it).I then brushed
the surface of the raised skin with different shades of red, acting like dried
scabs/clots at the edge of the wound, with darker reds.
I know things like this can't really be seen from the
audience but doing these little details mean that if you can see up close, it
looks just as effective as in the audience.

To create the effect of the blood seeping into the shirt
around the wound, I watered down the paint quite a bit, running the brush against
the edge of the rip, and then dabbed more of the watered down paint slightly
further out from the wound.
I then cut out the shape of the blood stain, where the white
of the fabric had just started to appear at the edges, hopefully making it look
a bit more realistic. I then applied double sided tape to the back of the wound
and stuck to the night shirt she would be wearing.
The double sided tape
worked well because it acted as if the blood had dried to the fabric and stuck
to the wound. I also had some threads frayed from the rip sticking into the
wound.

The above image shows photos throughout the process of
making the wound.
 |
| Original Performance Photos by Ashley Foster |
Links:
Thank
you to Ashley Foster for the performance photos, if you want to have a look at
his other work or more photos from the adult
production please visit his website at http://ashleyfosterphotography.co.uk/ The performance photos I
have used I have cropped down to focus on individuals, going to his website
will allow you to see full performance shots.
If
you are interested in the drama group itself that I do the costumes for please
check out their website at http://www.thegrangeplayers.co.uk or their facebook page https://www.facebook.com/thegrangeplayers where there are more
photos to look at and you can check out any upcoming shows.
Talk to you soon.
~K